Sunday, 11 August 2013

Flowers at Sunset


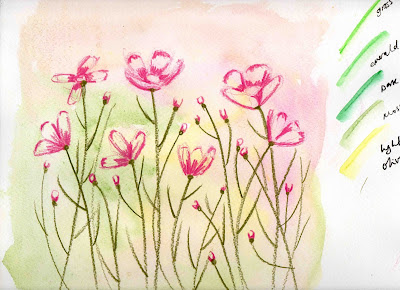
I'm continuing to try out different shapes/sizes and colour combinations, so today I'm using a background of sunset colours instead of greenery. Also trying out a tall thin format, which might work well on a card.

II used the same simple techniques as before, but with different colours. Wishy washy background to start with, and once that was completely dry, some simple flower shapes painted over the top.


I added some stems using a water-soluble pencil, with little knots under the flower heads and some extra ones to add some buds.


I then used painted water onto the stems to activate the water-soluble pencil, and painted in the buds and the one flower centre. A quick crop to trim off the mess, and voila!


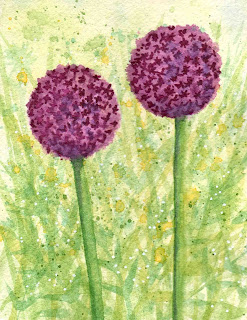
I used a similar background for some more Alliums (which are really fun to paint)...
 
 
It looked like this at the halfway stage:


More Flowers, Layer by Layer

I'm still enjoying painting flowers with watercolours, and am trying out different shapes and colours. Printed onto velvet paper, this one should work nicely on a card or notelets.

 
 I remembered to scan this one at every stage from beginning to end.  The very first thing I did was do some practice sketches to get a feel for the shapes of the flowers:


To start painting, I sloshed on a very wishy washy background using watercolour paint.
I left that to dry and then sketched in the flowers and stems using water soluble pencils:


I then painted in some translucent background leaves/stems using watercolour paint, and painted the flowers (except the centres) using watercolour paint over the soluble pencil (the pencil and paint merge together):


I finished off by painting in the yellow centres of the flowers, then masking them off and adding paint spatter.  I also cropped the picture to a nice card-friendly square shape:


It's my friend's birthday this week so I might make a set of little notelets as a gift for her.

Wednesday, 7 August 2013

Easy Watercolour Wild Flowers

I saw some pretty framed watercolour prints in a shop (I think the artist's name was Catharine Stephenson - really lovely work). Anyway, I couldn't afford them so I wondered if I could make something similar myself...


They were quite easy to do...here are some of the pictures at different stages:

Layer 1: Wet the whole sheet of watercolour paper and paint a very wet background wash of two or three light colours (I used yellow, bright green, pale blue). Leave to dry completely:


Layer 2: Sketch in the big flowers very lightly, to make a nice composition. (This is a different background - I used cotton buds on this one while it was drying to make little white dots):


Layer 3: Paint in some translucent grass/leaves/flower shapes to add a layered effect. It doesn't matter if they are a bit of a mess - they will disappear into the background. You can actually do this before or after sketching in the big flowers.
 
 
Layer 4: Now paint in some mid-strength small flowers and then your main flowers, being really bold with colour, size and shape. They need to look striking so the background will fade back.
 

Finish off by masking out the flower heads and adding paint spatter in all the colours used. Tiny dots of white Posca pen also work well.

.

Watercolour and Aquamarker Alliums

 
Alliums are my favourite flowers this summer and they are a nice easy shape, so I decided to paint them.

I started by laying a wet wash of pale yellow and green over the whole paper. Once that was dry, I blocked in the flower heads using a Tombow brush pen.  Next, I painted some translucent grass and leaf shapes, and added some yellow paint spatter (masking out the flower heads).
 
 
I then used an Aquamarker (Grape - perfect colour) to draw the tiny flower heads of the Allium head, and dabbed all over with a wet paintbrush to spread the ink and soften/blur some of the detail. I painted in the stems using watercolours, using a bluish purple colour to add a shadow side to the stems. I used the same colour to add a little extra texture to the flower head too. A few tiny dots of white Posca pen added the final sense of movement.


Gel Pen Dandelions

I really hate the ammonia smell of masking fluid, so I'm trying out alternative resist techniques. I drew the heads of these dandelions using a clear Sakura Glaze pen, let it dry, and then painted a watercolour wash (3 colours) right over.  When the paint was completely dry, I rubbed the gel pen with my finger to clean up the gel pen.  It's not bright white like masking fluid, but it's not a bad alternative.


I did the same again here, but I also sprinkled some salt into the wet wash, to create a grainy mottled effect, and flicked some paint spatter. I quite like the effects but I wish I'd masked the dandelion heads from the paint spatter.