I'm a bit impatient when it comes to image transfer techniques, so I like to use tissue paper and mulberry paper overlays. I used tissue paper for this one.
I started by painting a book page pink and scrubbing on a bit of white paint.
A few steps here: I used a roller to add some blocks of purple colour.
I then used a tile adhesive tool to 'comb' a smear of black paint on a glass board to create rough stripes, which I printed onto the page...
I then added my tissue paper image, using plenty of matte medium so the paper went transparent.
Next, I added some stencilled lettering and darkened the edges of the page...
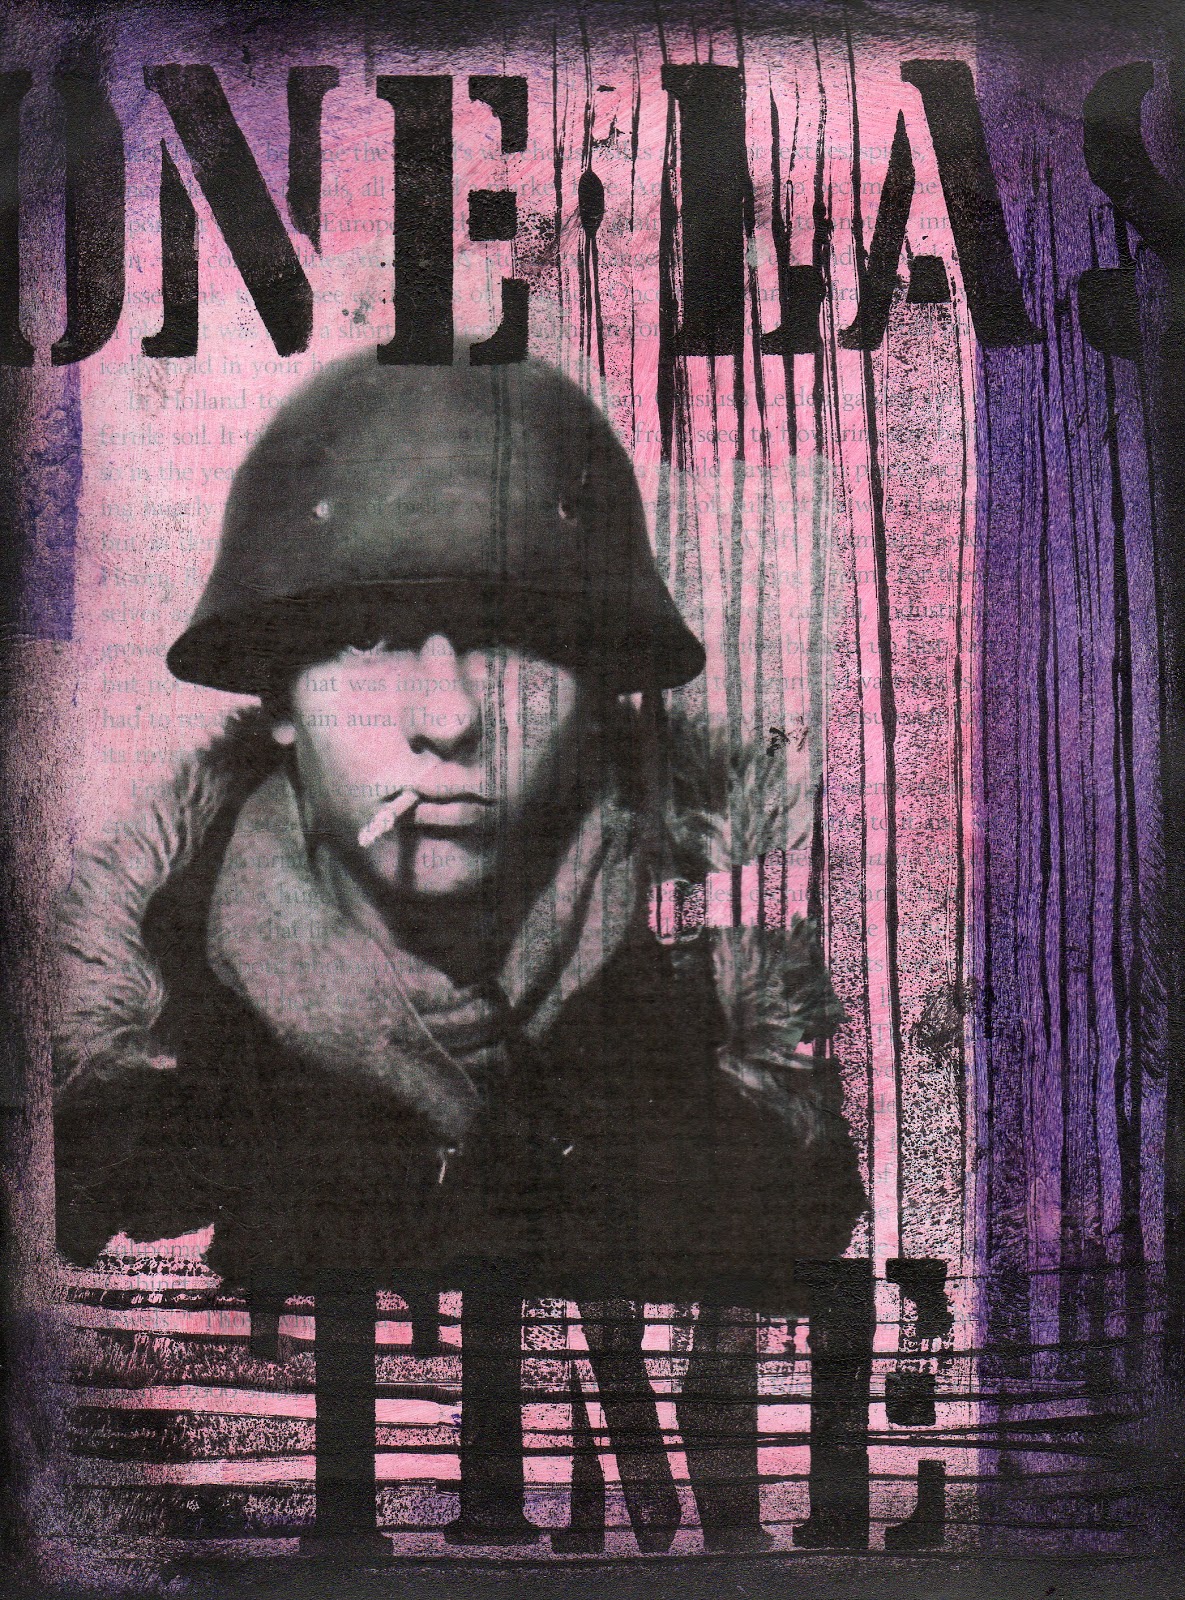
Plus some stamping and edging lines...
I finished off by adding stamped journaling and some final detail using a blue Pablo pencil.
The journaling is about saying goodbye to this image of a soldier, which I like so much I've used it many times in various mixed media projects. This is the 'one last time' I'm using it, and luckily I'm quite pleased with this swansong page!
Showing posts with label Art Journals. Show all posts
Friday, 23 November 2012
Friday, 16 November 2012
Second Attempt at Self Portrait
So here's my second attempt at a self-portrait. I liked the pink hair so much last time that I decided to go with it again, but I think this one is a better likeness of my face. I decided to add some journaling and make it into an art journal page.
I used watercolour paints, watercolour pencils, and a pink brush pen.
My Art Tower - Grunge Graphic style page
This tower is opposite my favourite art shop in Hove. It acts as a landmark as I'm driving along, and whenever I see it I associate it with good feelings of creativity.
I started by painting a book page with red transparent acrylic, then did some simple pinted blocks of black, some white stenciled text, and some grungey paint scrapes.
I added my printed tower image and large stenciled lettering, and finished off with some journaling (Posca paint pen).
I'm a fan of the black/white/red combination and I like the striking image of the tower, so I'm quite happy with the way this page turned out.
Sunday, 11 November 2012
I'm back, and I've been busy!
Yes, my Art Journaling mojo has finally returned, and I have been making up for lost time. I've set up a makeshift studio in the utility room, and I've been busily making a mess out there...
I cut the hare shape from acetate to make a mask, and just used it with acrylic paints and a sponge roller. I mis-spaced the lettering so it's turned out a bit messy (note to self: pencil it in first next time!) but I'm just pleased to finish my first page in many months.
Is it a utility room? No, it's an art studio! |
Handy washing line - perfect for drying wet paint! |
As you can see, I have a lot of pages on the go at once. Here's the one I finished first:
I cut the hare shape from acetate to make a mask, and just used it with acrylic paints and a sponge roller. I mis-spaced the lettering so it's turned out a bit messy (note to self: pencil it in first next time!) but I'm just pleased to finish my first page in many months.
Wednesday, 1 February 2012
Sleek Art Journal Cover
I'm quite pleased with how this book cover turned out. The silver shapes are embedded (I just found out it is called 'piece work'?) so the surface is smooth and flat, apart from the metal letter tags (and the embossing). Maybe a slightly unusual look for a book cover, but then I generally like 'unusual'!
Friday, 27 January 2012
Hand Lettering - Journal Page
I've been computer-printing a lot of my wording recently, and had lost confidence in my hand lettering skills. This troubled me, because I feel that hand lettering is a hugely important element of art journaling (because it is so personal, and unique to the writer). Always best to tackle a problem head-on, so I thought I'd go for it, and do a page with a major focus on hand lettering.
I'm quite pleased with the lettering, so hopefully if I keep at it my confidence will return. (And yes, the love affair with orange continues!) The white highlights are Posca paint pen, which is an absolute joy to use and has ended my quest to find the best white pen on the market.
Wednesday, 25 January 2012
Thinking about Personal Imagery/Style/Keywords
Inspired by Corey Moortgat's book 'Personal Imagery' I've been trying to identify lists of themes, images, colours etc which I'm drawn to, or which mean something to me in my art work.
The page is just a watercolour background with collaged words and my trademark black/white stripes. I finished by drawing the peacock feathers basically to fill the empty space.
Another Hand-Made Stencil
I'm pretty pleased with this page, particularly with the stencil, which I made from scratch from a photo. It's a bit more complicated than that last one (more positive/negative shapes). I used black acrylic paint with the stencil, but all the wording is computer-printed because I wanted a really crisp, graphic effect.
Here's the original photo which I started with:
Sunday, 22 January 2012
More Orange! Back to Collage.
I haven't done a purely collaged background for ages, so I went for 'colour/mood collage' here, and then added paint, stamping, distress ink and coloured pencil.
Saturday, 21 January 2012
Music is My Drug - Using the Stencil I made
I've been wanting to make a journal page about the big effect music has on me (especially when I'm doing something creative). I had that in mind when I chose the design for my DIY stencil the other day.
I usually only use small pieces of patterned paper (cut up and collaged), but I thought this ethereal pink one would work perfectly as a background with the stencil. I put a simple page together quite quickly, using the stencil (with acrylic paint), a scroll design rubber stamp, and some ink spatter to finish.
Art Journal Covers
I made some covers to keep my art journal pages in, using my new favourite colour...orange! (Notice the blog's zingy new look as well!)
Friday, 20 January 2012
Another Technique: DIY Stencil
I have decided that my art-related goal for 2012 is to be more adventurous with techniques.
I tried the basic monotype print technique in my last post and this time I'm making my own stencil from acetate. The original picture which I traced the shape from is actually a design for surfboard artwork, by Stina Persson. I thought it would work perfectly for a stencil, so I traced it onto a sheet of acetate and cut out the negative shapes using a very sharp blade. Voila - a unique and very cheap stencil.
Saturday, 14 January 2012
Blue Sky Thinking...journal page
We went for a walk on the beach today. It was cold, but the sun was shining and the sky was so incredibly blue that I couldn't help feeling wonderfully cheerful and positive. I wanted to make a journal page which captured the blueness of that sky, and the uplifting feeling it gave me.
I found the perfect colour and painted a background onto Yupo. Yupo isn't absorbent, so you can use a damp paintbrush to 'lift out' areas of paint, like this:
Then I drew in some cheerful floral-type doodles which I'd sketched a while ago. I didn't add any other colours to distract from the blue.
I could have just added the journalling in black but decided to make the blue 'pop' even more by matting onto a black background and journalling in white. Quick and easy, but I was pleased because it really does capture my feeling about that blue sky.
Thursday, 12 January 2012
Return to Art Journalling
After months of cardmaking and photography projects (plus the Sketchbook Project), I have finally got back into art journalling. It was great to crank up the music (African Guitar Legends - great background music) and get the paints out again after so long.
The compass is a Tim Holtz mask (which I failed to stick on straight!) and I used a lovely huge skeleton leaf on the other page, which adds a nice bit of texture.
Sunday, 8 January 2012
Last Sketchbook Project Pages
A couple more pages from my Sketchbook Project, which I managed to finish and which is now winging its way over to Brooklyn NY. I was trying out my new Rotring ink cartridge pen here, plus watersoluble crayons.
Sunday, 31 July 2011
More Sketchbook Project Pages
Koi Carp - Watercolour on Yupo Paper
Construction site with Crane - Ink/acrylic on Watercolour Wash (Yupo Paper)
Trees - Coloured pencil/ Ink on Watercolour Wash (Yupo Paper)
Saturday, 30 July 2011
Saturday, 16 July 2011
Step-by-Step Watersoluble Crayons
And for a break from the difficulties of Yupo, back to normal watercolour paper for some nice cheerful loose watercolour flowers! Here's a step-by-step...
Step 1 I drew some bold flowers on bigger-than-A4 paper, using just a couple of colours - quite scribbly....
Step 2 I added plenty of water using a large round watercolour brush. Also added some spatter with a smaller brush....
Step 3 I tidied up the edges and added definition with watersoluble pencils into the wet paper.
Step 4 - I could have left it like that but it looked a bit lacking so I decided to write on it to make it a journal page.
Step 1 I drew some bold flowers on bigger-than-A4 paper, using just a couple of colours - quite scribbly....
Step 3 I tidied up the edges and added definition with watersoluble pencils into the wet paper.
Step 4 - I could have left it like that but it looked a bit lacking so I decided to write on it to make it a journal page.
More Adventures with Yupo
You can't really layer paint with Yupo because even when it's dry, a wet brush just lifts it away completely, leaving white paper. This can be very frustrating! It took me some time and a very light touch to get round the problem, but I'm quite pleased with the light and airy feel of this summery double page.
Here is the underlayer, for those who are interested in watercolour backgrounds.
Subscribe to:
Posts (Atom)